How To: Automate VM and Resource Creation using Azure Resource Templates
Today I'm going to demonstrate how to create Azure resources using Azure Resource Manager templates. This article assumes you have an understanding of creating resources inside resource groups in Azure.
What are Azure Resource Manager templates?
Azure Resource Manager templates help automate the creation of Azure resources. ARM templates are formatted in JSON and can be easily edited in any text editor. ARM templates save minutes to hours of clicking around the Azure portal to create the resources you want; ARM templates can create resources in a matter of seconds.
ARM Template Code Samples
Before we begin, you're probably asking, "where can I find code samples for ARM templates?". Fear not! You can find them via Microsoft Learn as well as via Azure Community Code samples.
I'm now going to demonstrate creating a VM in Azure via an ARM template. The process is similar to creating other resources as well.
Recommended resources
You're going to need the following:
- An Azure Storage Account with a blob container set to anonymous access
- Access to the Azure Cloud Shell
- Visual Studio Code
Configuring your Azure Storage Account
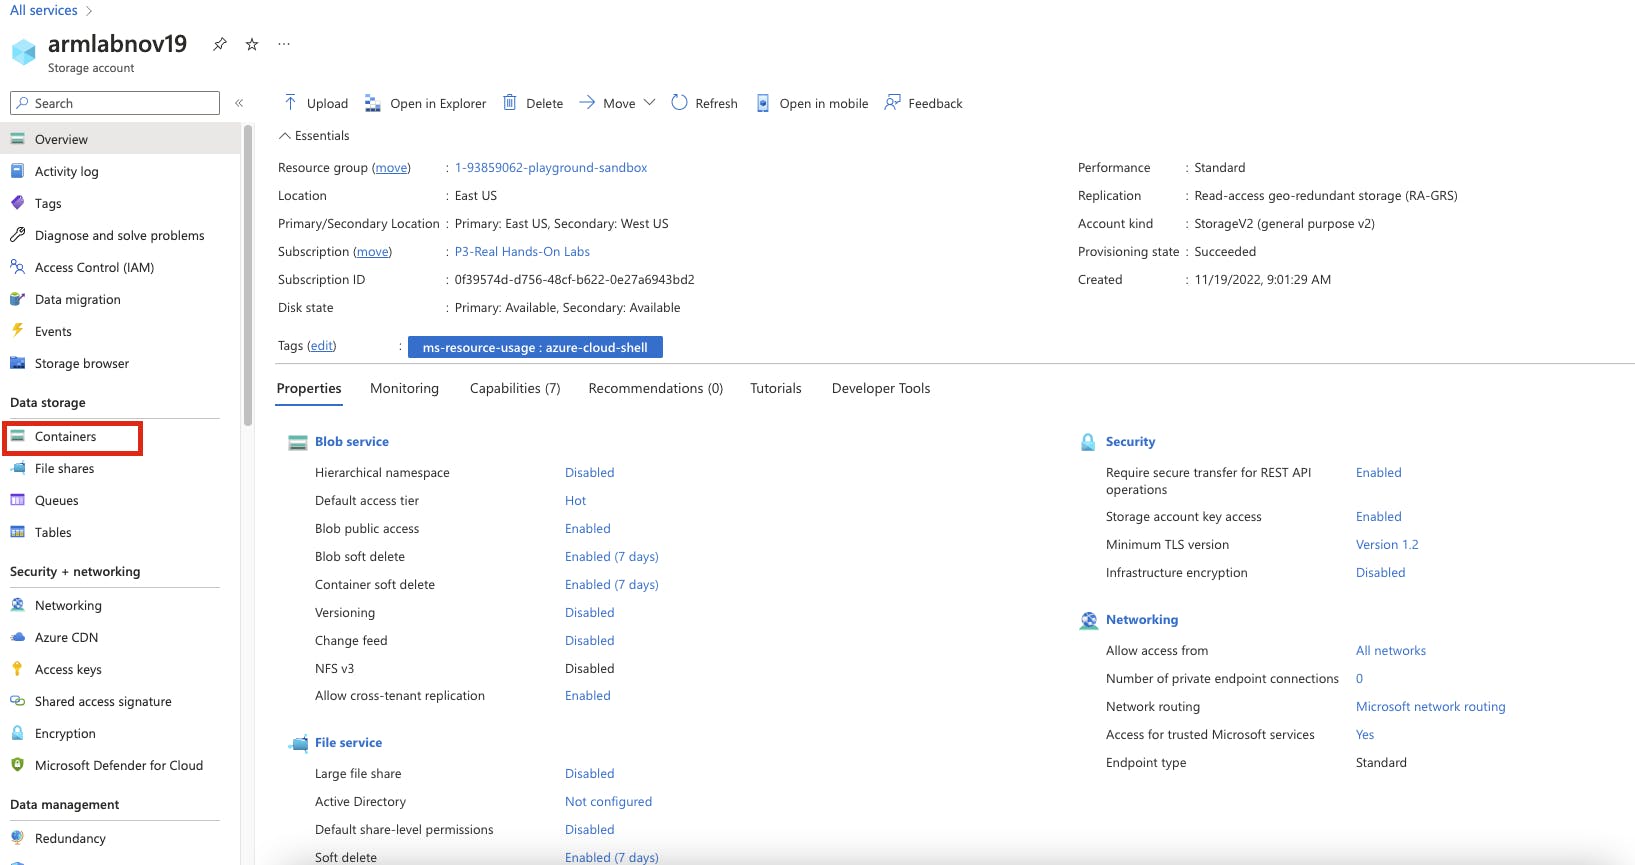
First we're going to configure our storage account. Navigate your way to the Azure portal and go to the Storage Accounts page.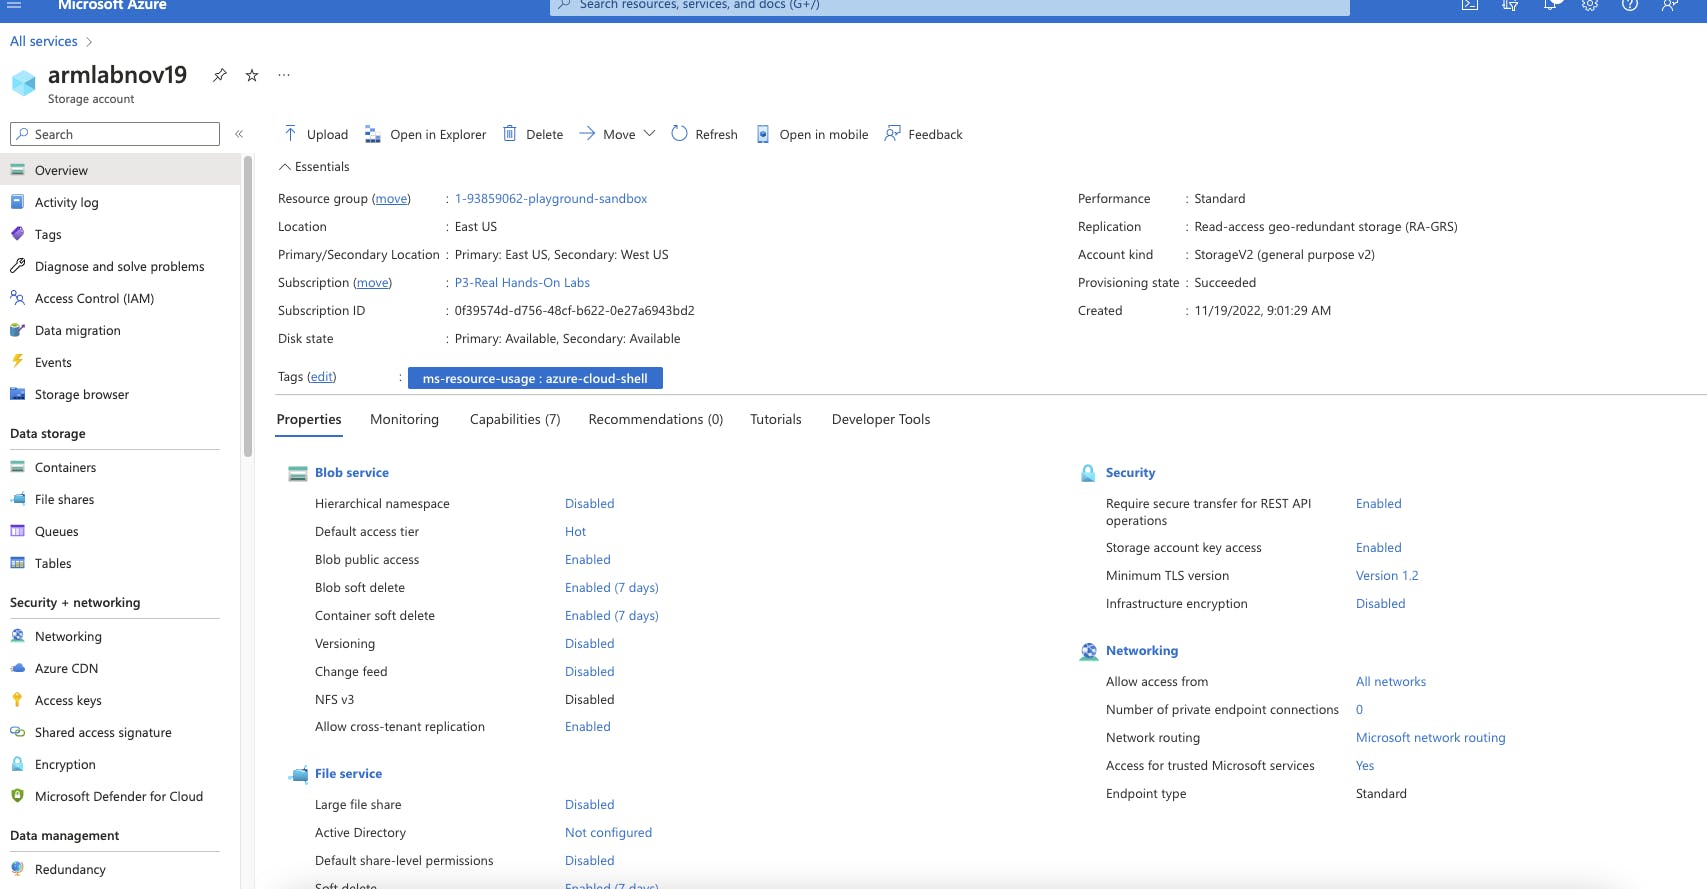 Once you're there, click on "Containers".
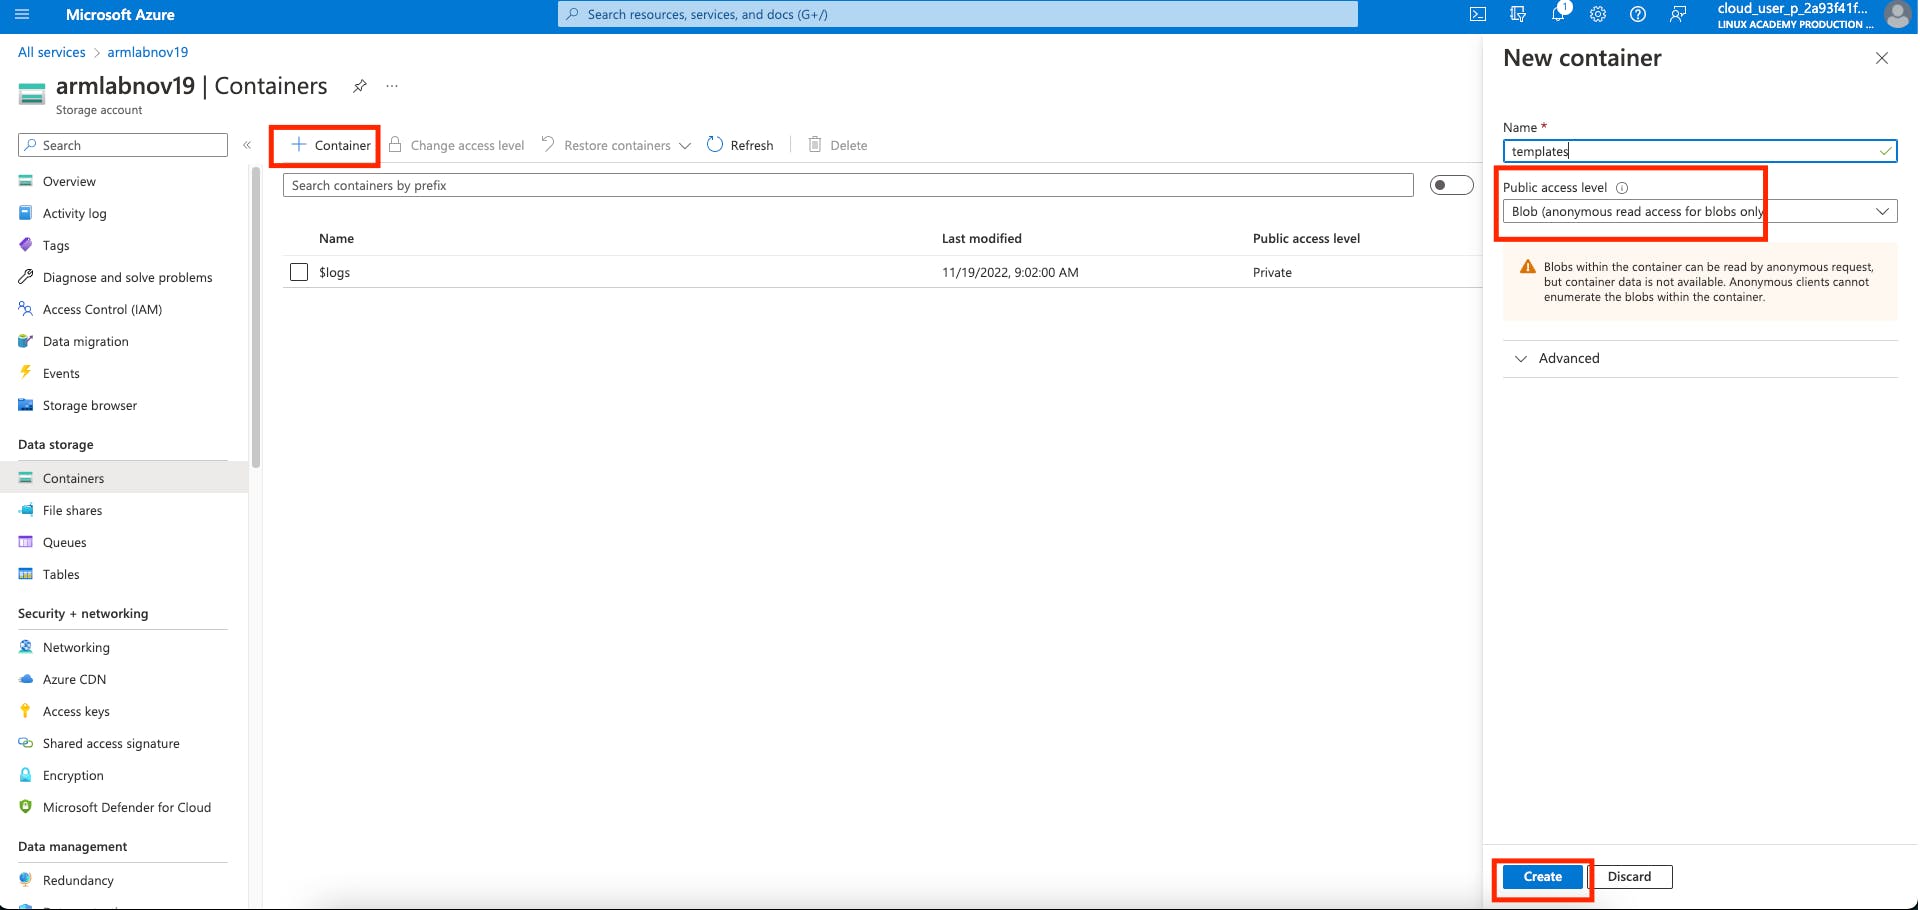
 Create a new container, call it what ever you'd like, and set the public access level to anonymous read access.
 Making a Template
Now that you've made your template container, let's go ahead and make ourselves an ARM template. For this demo, go ahead and grab this code sample and open it in your favourite text editor.
Once you open the .json file, you will see that everything is constructed for you. The only things we need to modify are our subscription, and resource group.
 Optionally, you can change the VM name if you'd like. Just make sure you change the "dependsOn" keys to match your VM name, or else Azure CLI will error out when trying to build the resources. Anywhere you find "linuxVM", you need to change it to your preference.
 Going back to modifying the subscription and resource group, one quick way you could get the URI (subscriptions/yourSubscription/resource-groups/yourResourceGroup) is to run the
 az group list command in Azure CLI, then selecting the resource group you want, and copying/pasting the URI into the template.

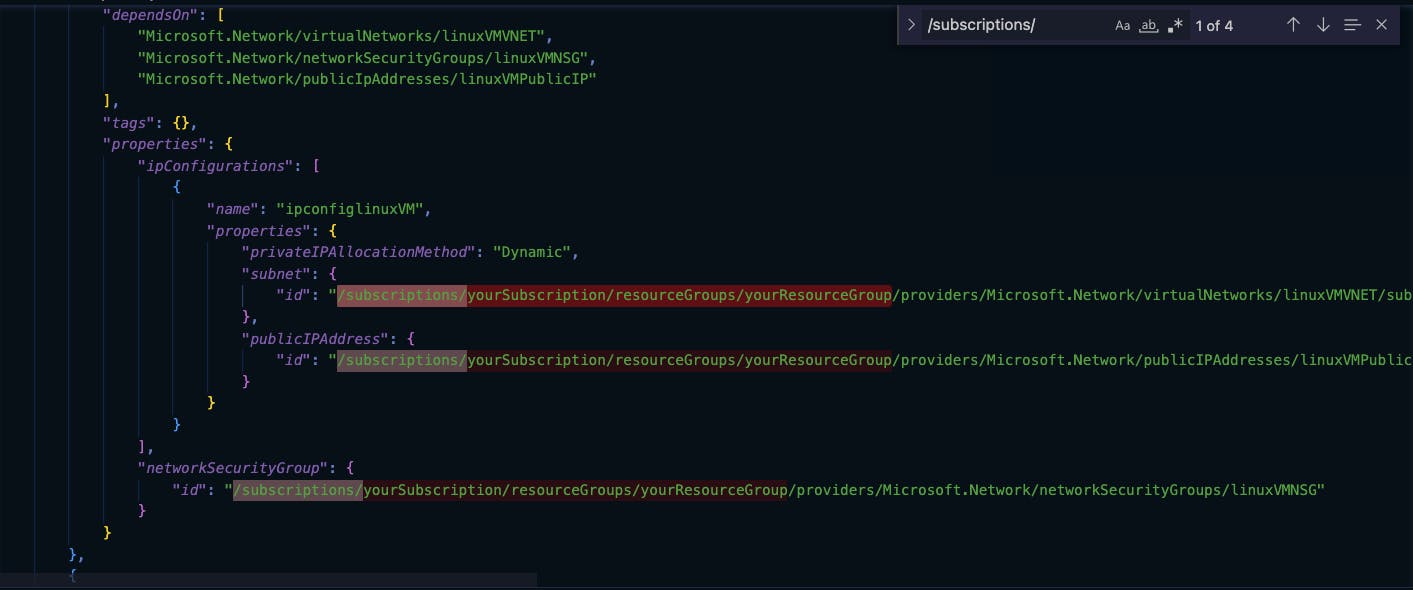
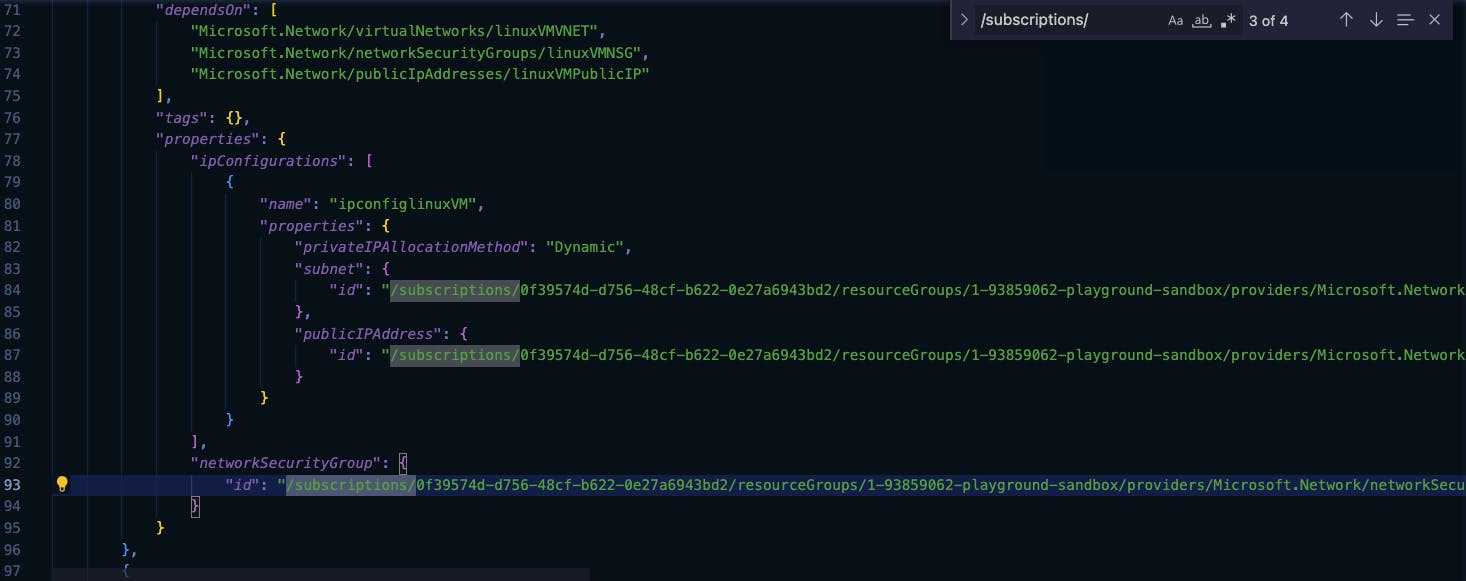 After you've edited the subscriptions/resource-group URI and set the VM name to your preference, you're ready for the next step.
Uploading the Template to your Blob Container
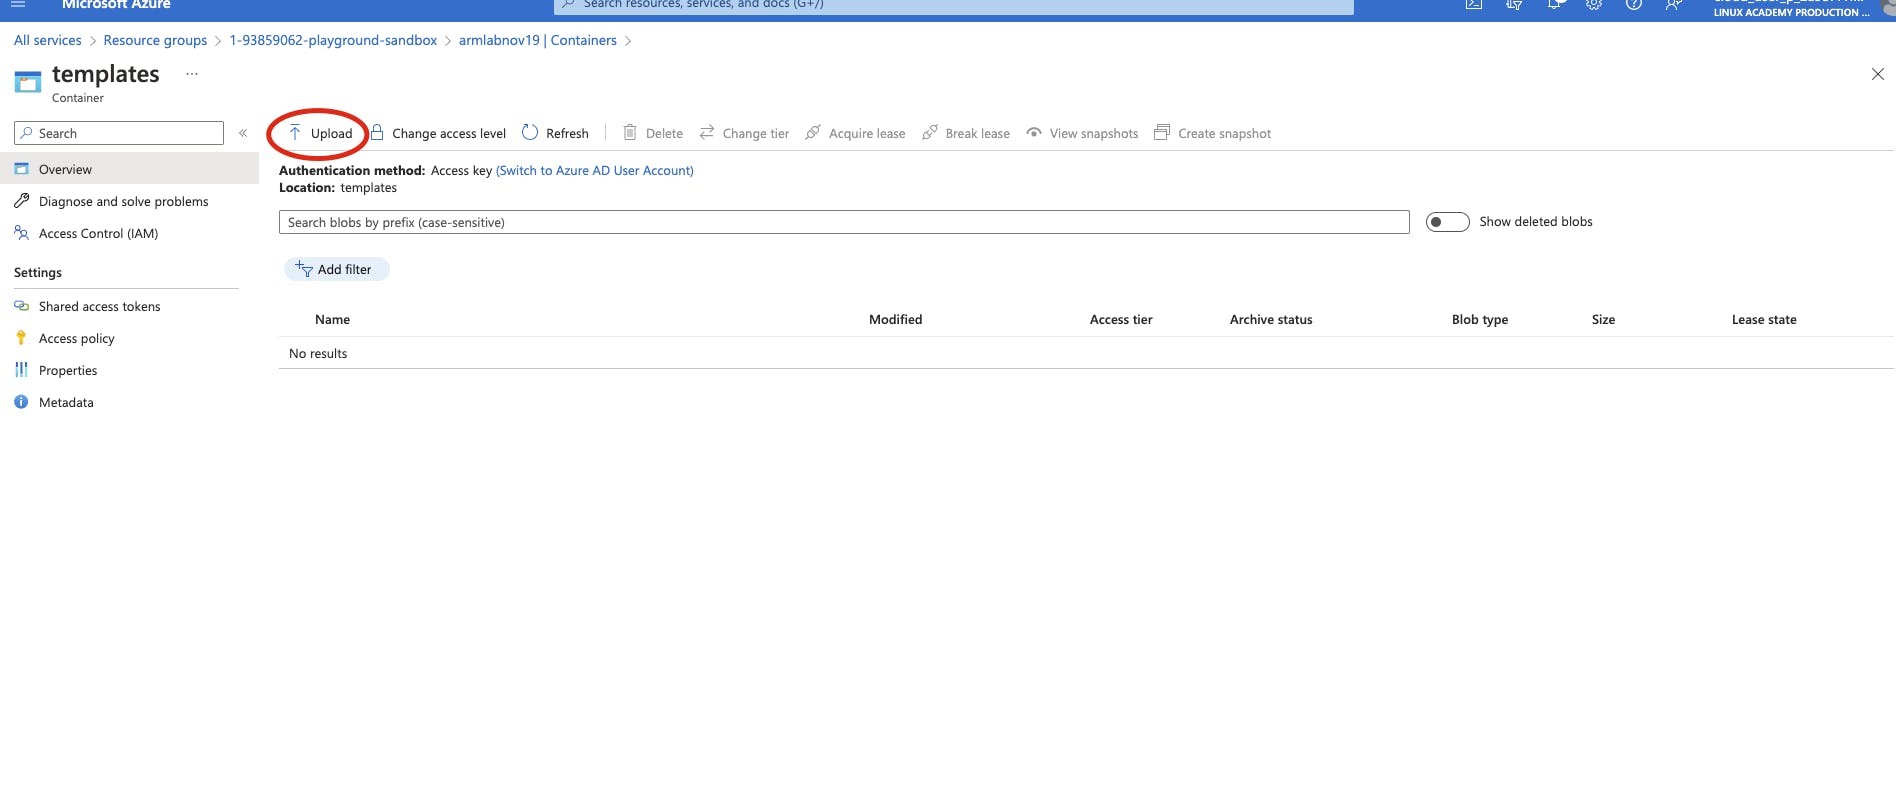
Go back to your Blob Container and click Upload.
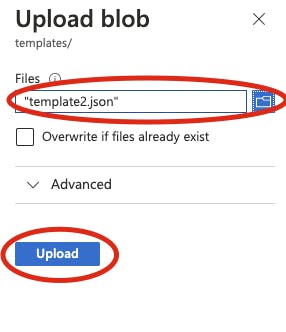
 Click select a file and choose the template.json file. Then click upload.
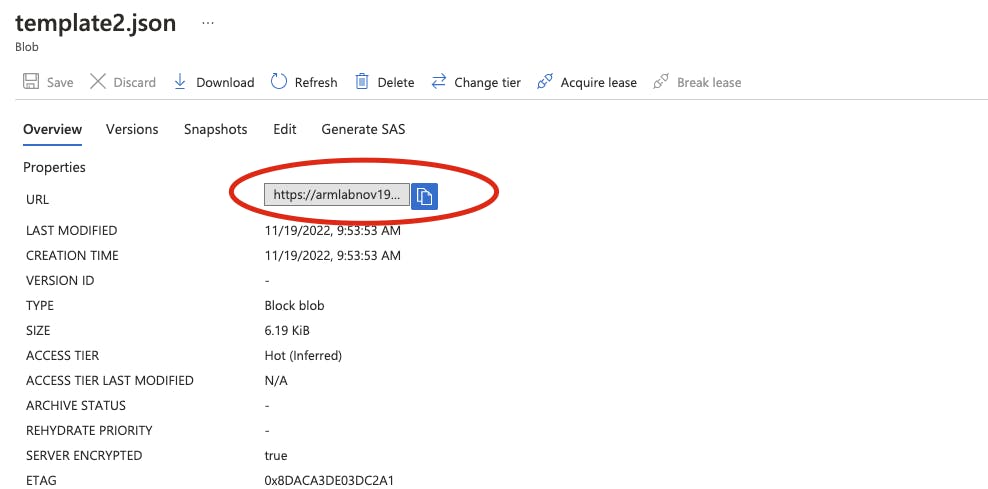
 Once you've uploaded the file, click on the file, and note the URL. This will be important for the next step.
Deploying the Resources
Navigate to the Azure Cloud Shell and run the az deployment group create command. The syntax for the command is as follows: az deployment group create --resource-group [rg-name] --name [deployment-name] --template-uri [url-of-template]. The template-uri parameter is the URL where you uploaded the template into the blob container.
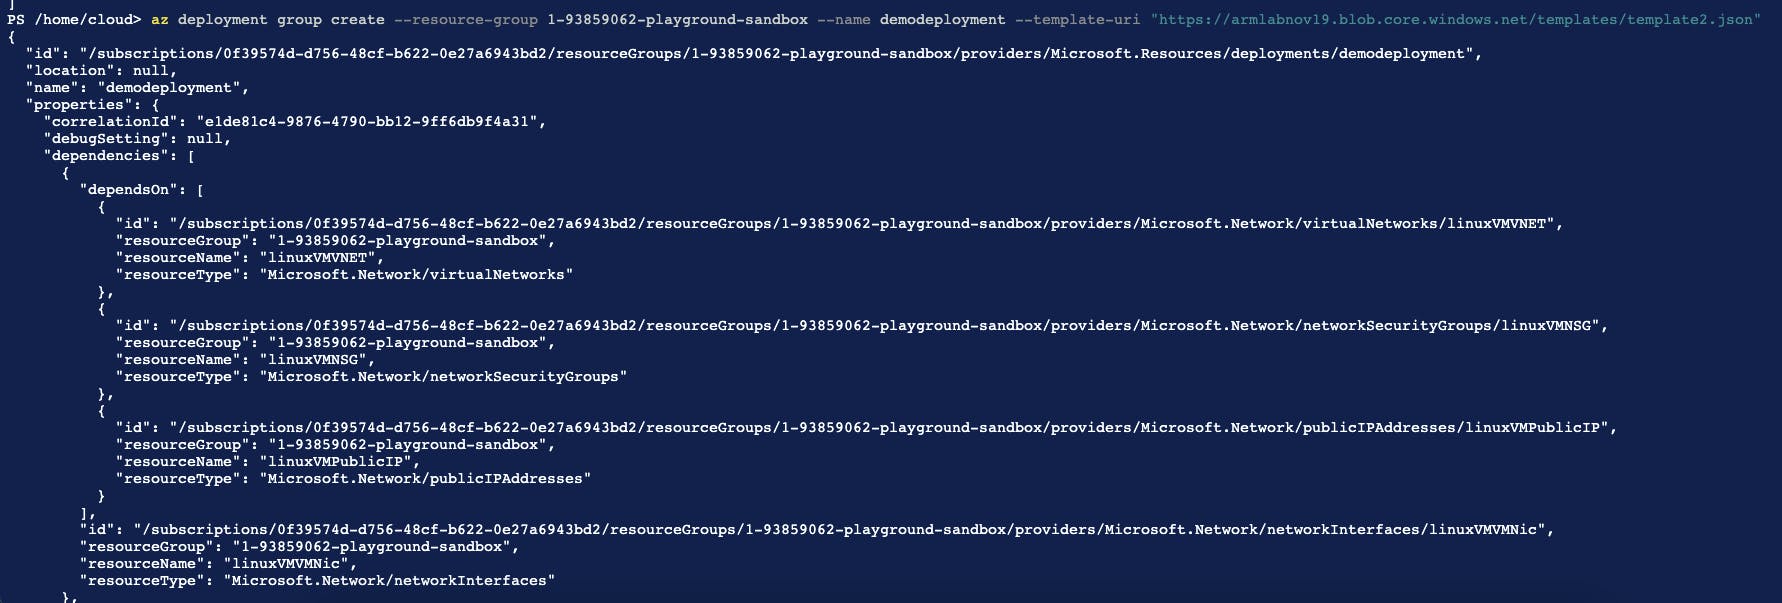 If the command is successful, then it will output JSON summarizing what was deployed.
Resources Deployed
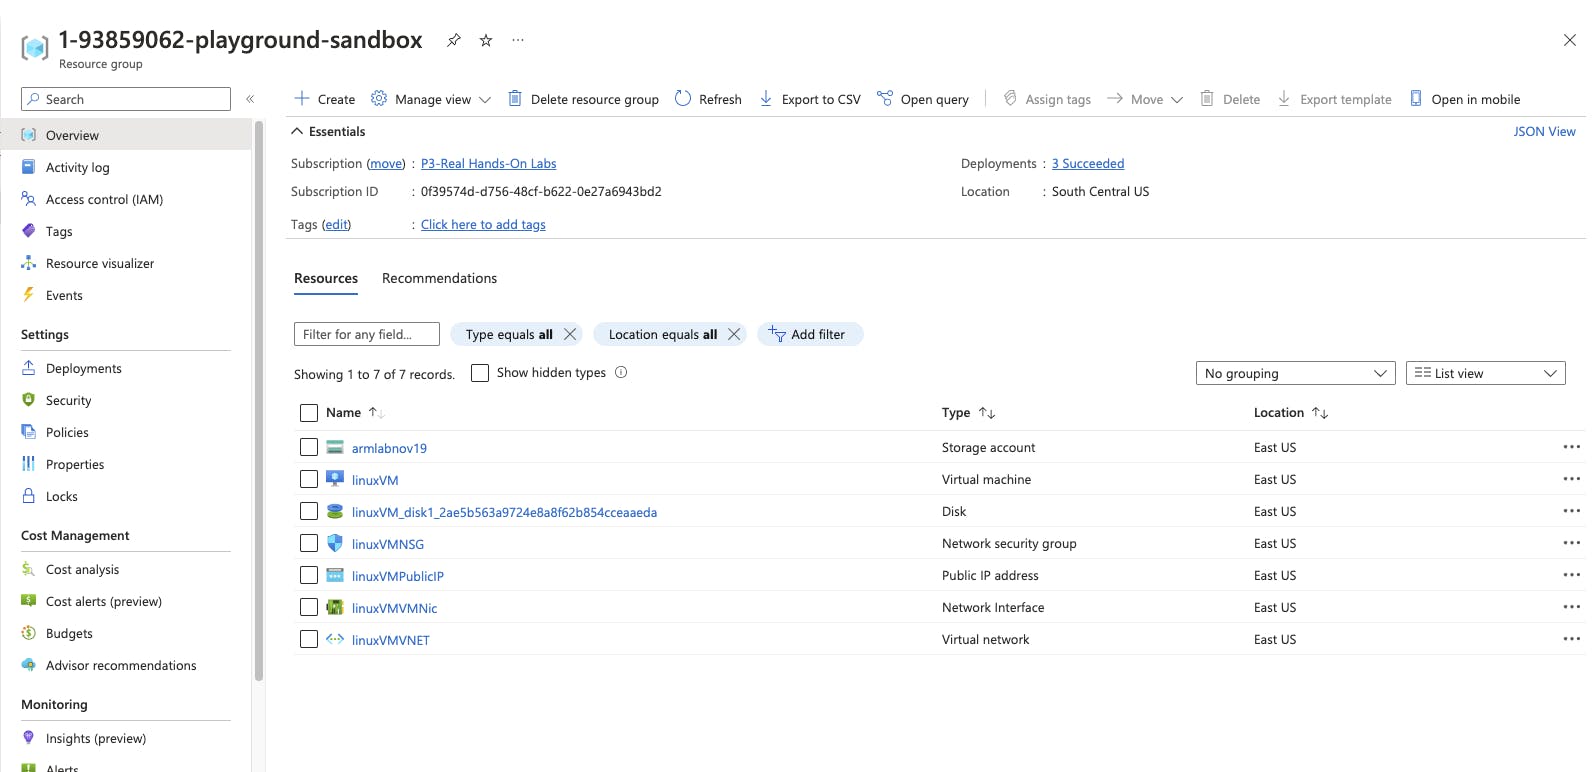
You can go to your resource group in the Azure portal to see the resources deployed. As you can see, we successfully deployed the VM, along with the other resources the VM depends on.
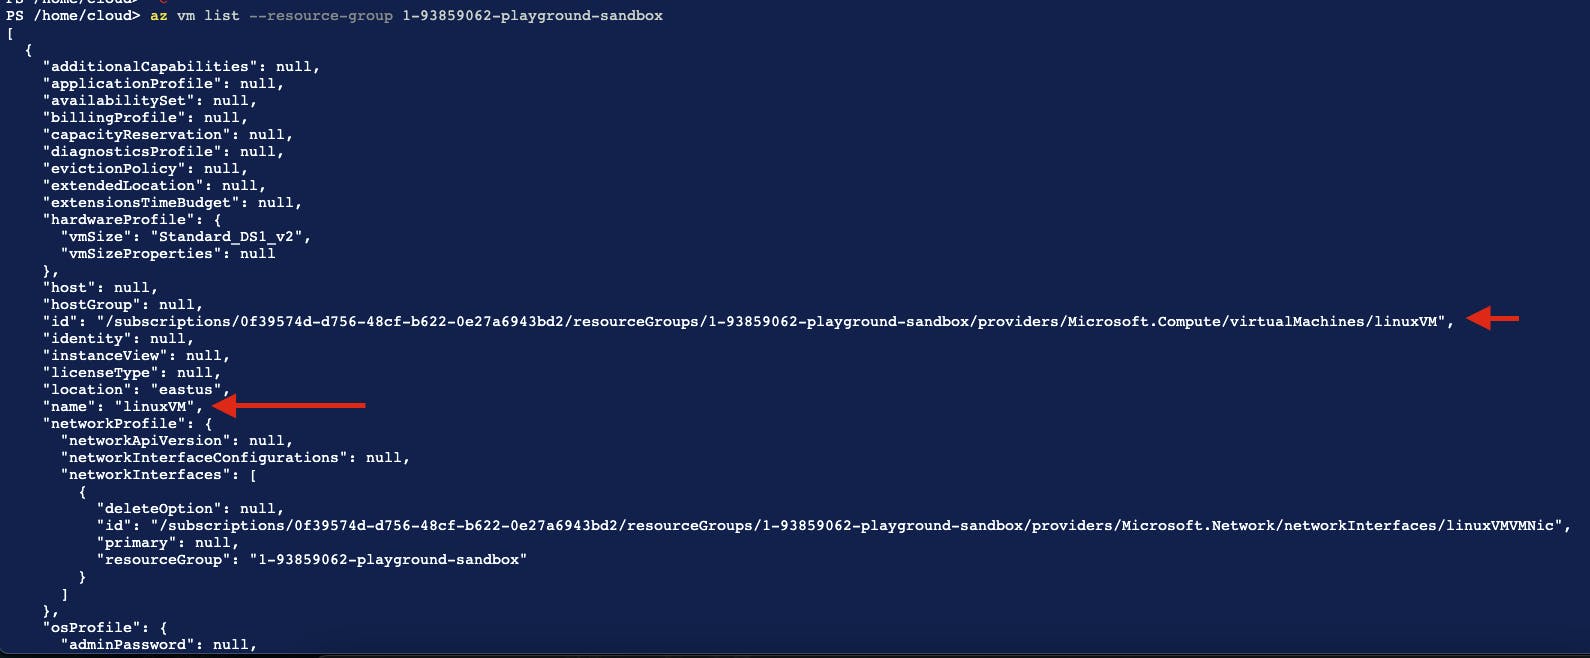
 Or, if you want to be nerdy, you can run the
 az vm list command to see the VM in the Azure CLI.
Congratulations! You deployed resources in Azure using ARM templates. There's a lot you can do with ARM templates. It saves tons of time as you don't have to click any buttons. Automation is a key skill for Cloud Engineers. It will help you in the long run.
Thanks for reading my article. Hopefully you learned something new. Feel free to leave feedback in the comments for me if you'd like. Good luck with your cloud adventures!
