Proxmox: How to deploy pfSense and connect VMs


If you're trying to deploy a virtual router/firewall in Proxmox and deploy VMs behind that device, then you've come to the right place. In this article, I will demonstrate how you can deploy pfSense in Proxmox and connect VMs to the pfSense firewall.
Diagram
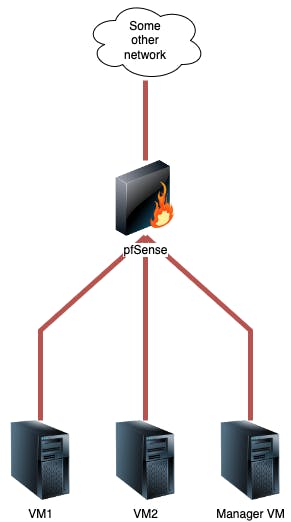 This diagram depicts our intended setup. We will have our pfSense firewall on the edge, and all VMs will connect to the firewall. Alongside creating a VM for the firewall, you will also want to make a management VM so you can access the firewall's web portal.
Pre-Installation Configurations
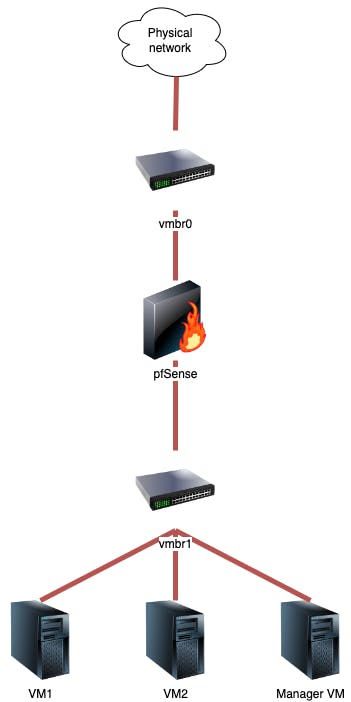
Before we deploy the firewall, we'll have to make an adjustment in the Proxmox network settings. A firewall, or any router, needs at least two network interfaces in order to do its job. Proxmox, and many other Type 1 hypervisors, have a feature called virtual bridging.
Virtual bridging connects VMs together in a virtual network. It's just like connecting computers together using a switch. The only difference is that there's no cables to plug in.
In our case, we will use two virtual bridges. The default virtual bridge (vmbr0) will be used to connect the pfSense firewall to the WAN side. We'll create an additional bridge (vmbr1) that will connect the pfSense to the LAN side, as well as to provide LAN connectivity for the VMs. See the image below for a visual example.
Step 1
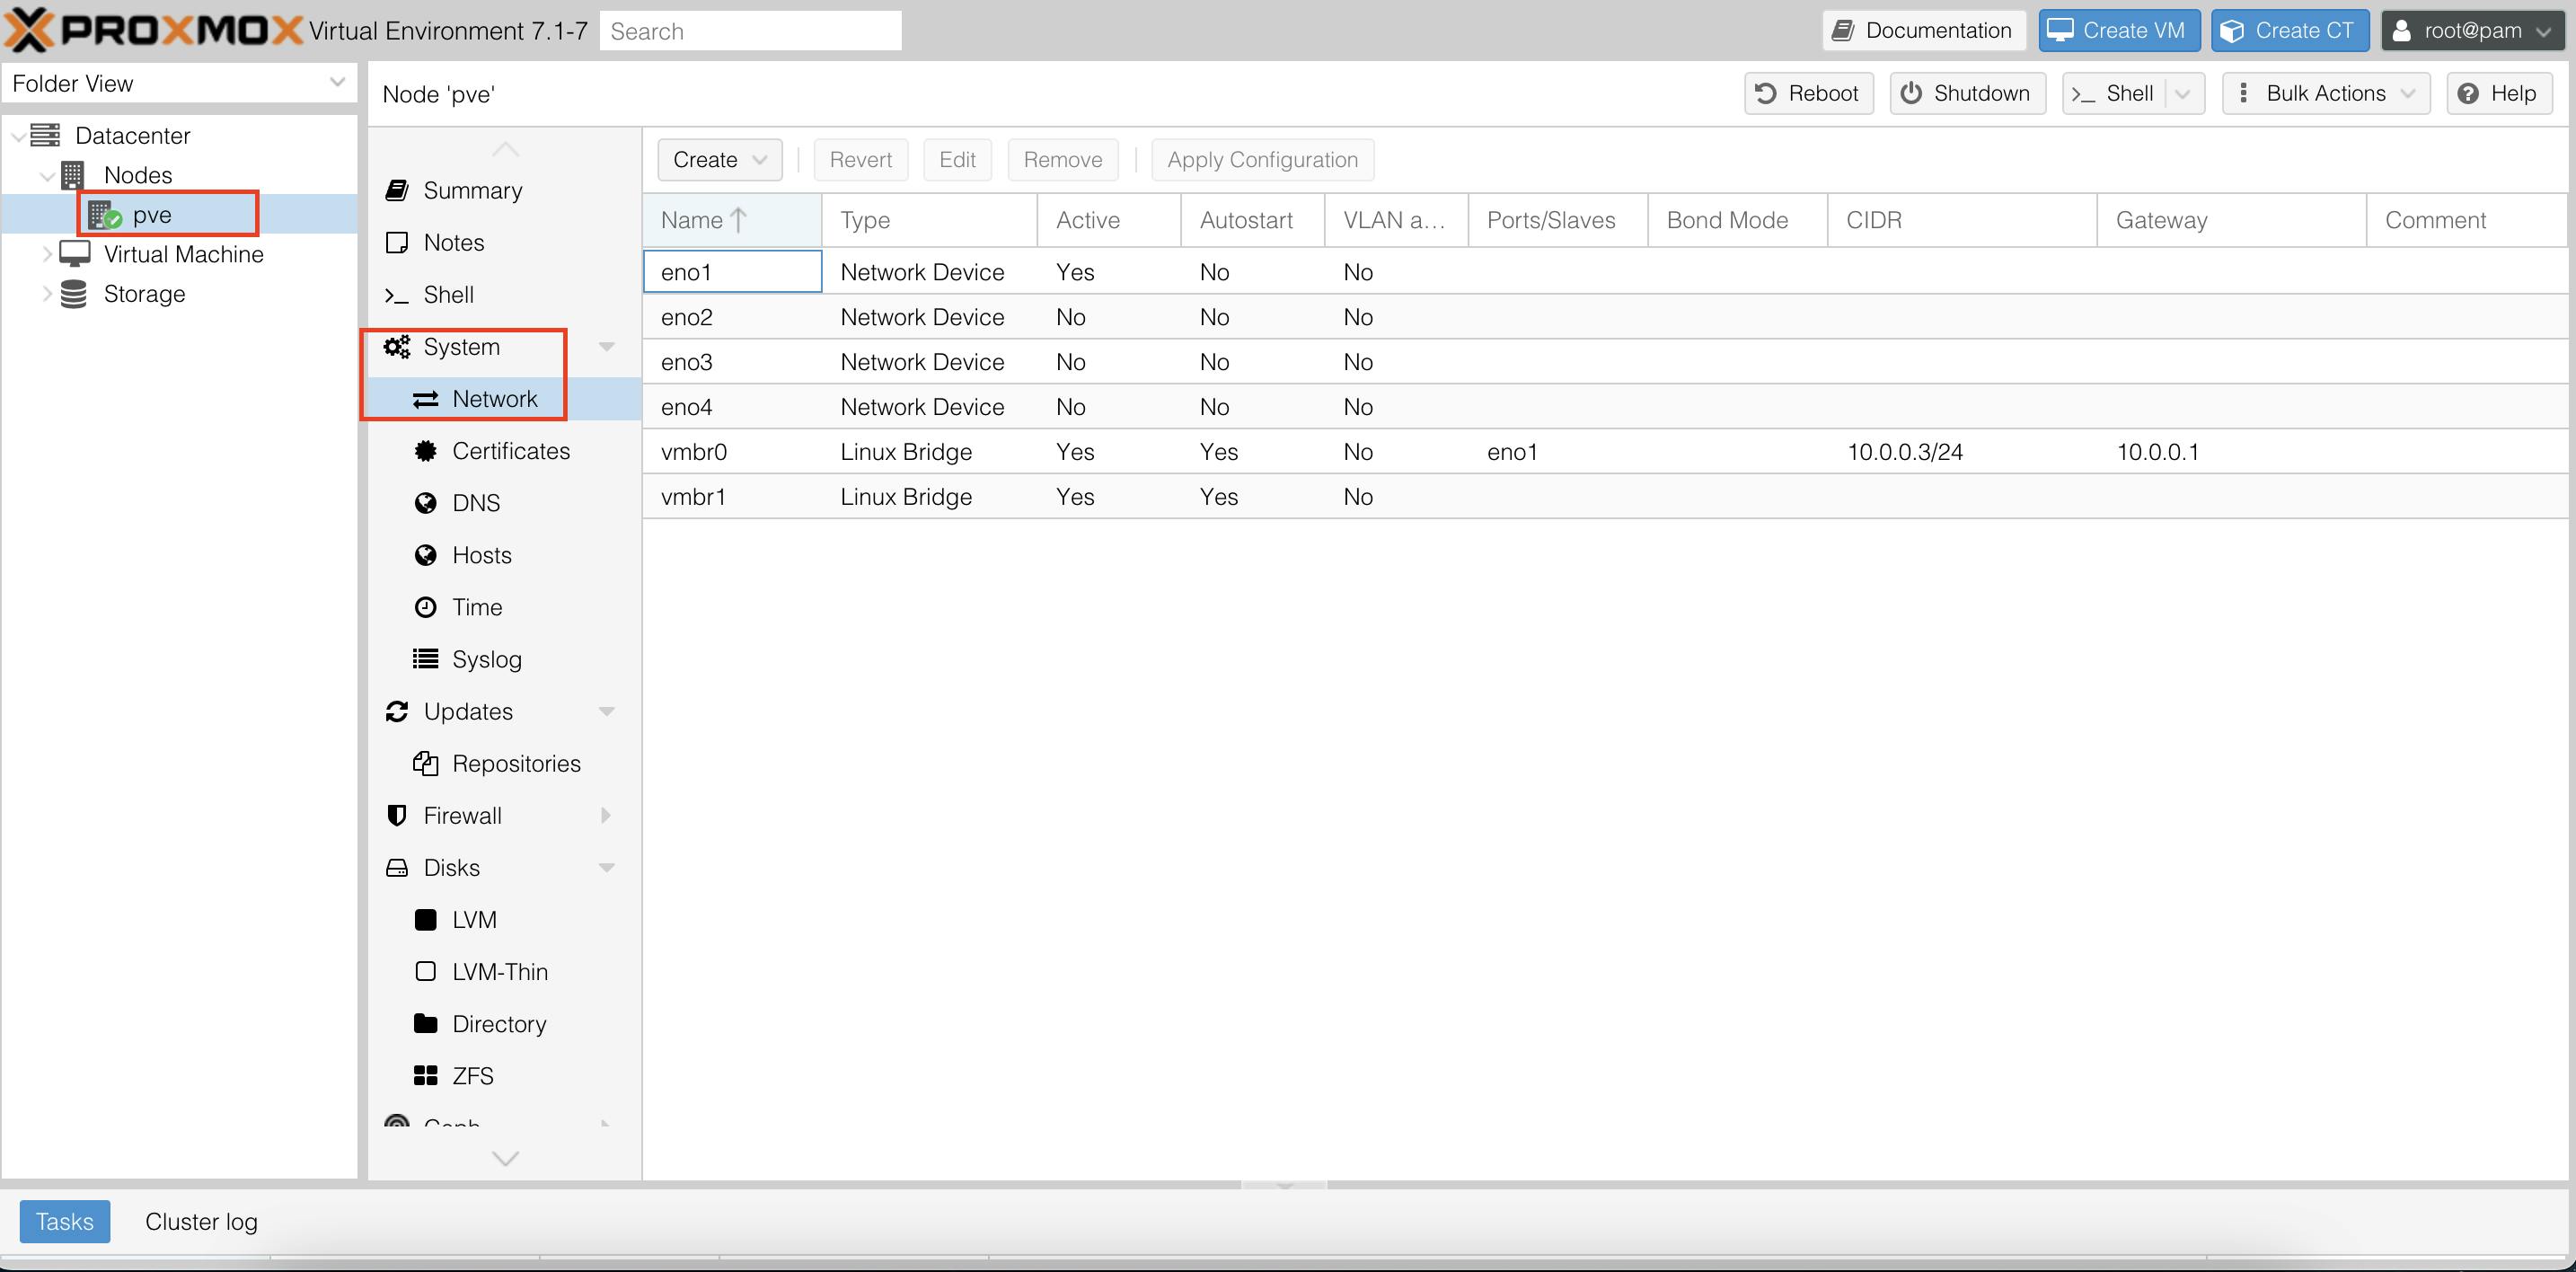
Go to your Proxmox web portal and navigate to your node. Once you're there, click system, then click network.
 Step 2
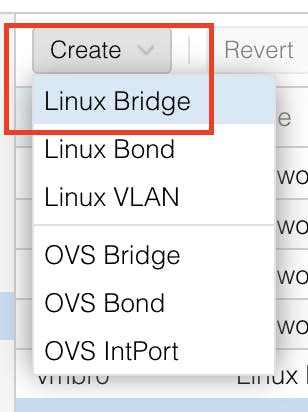
Click create then select linux bridge.
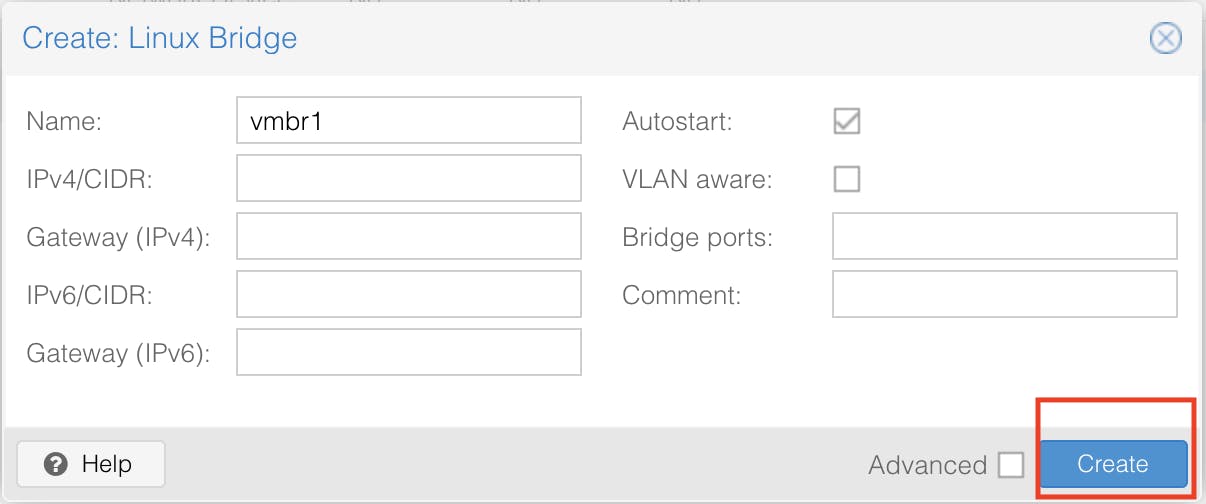
 Step 3
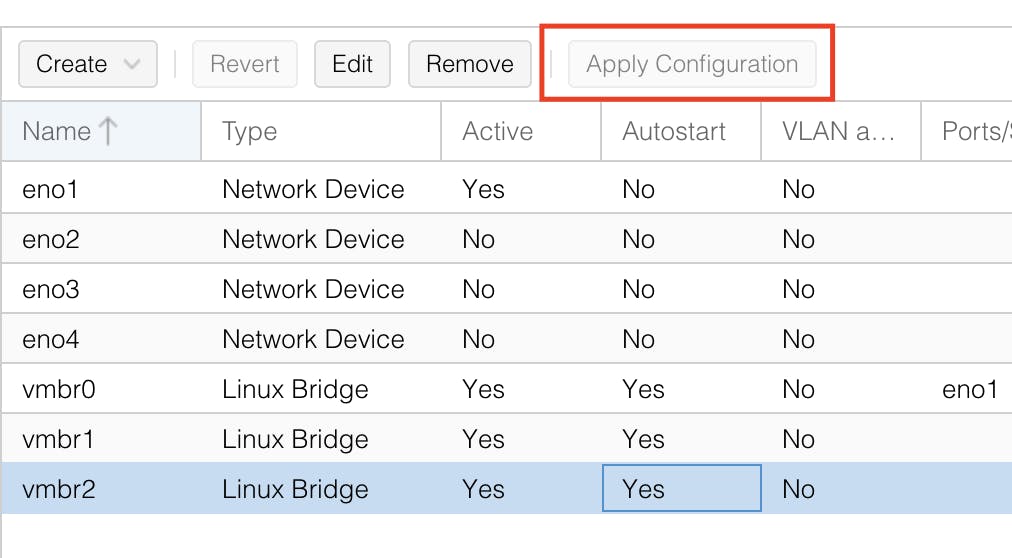
Verify the name of the bridge is vmbr1 then click create. Don't worry about filling anything out as it's not necessary. After creating the bridge, click apply configuration, then we'll be ready to make a VM.
Deploying the pfSense VM
Step 1
Start creating your pfSense VM. Leave all the settings as default as we don't need to change anything yet. Just be sure not to boot it yet as we have to make an additional configuration.
Step 2
Once you've created the VM, navigate your way to the hardware tab, then click the add button.
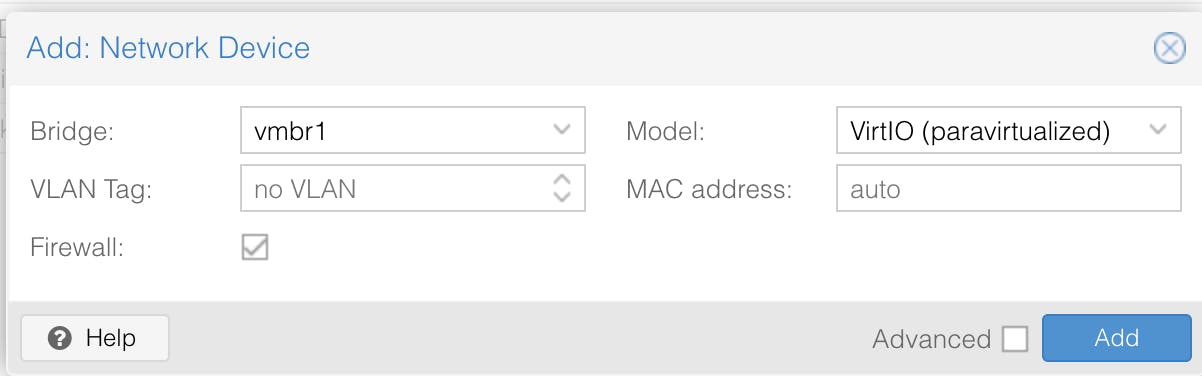
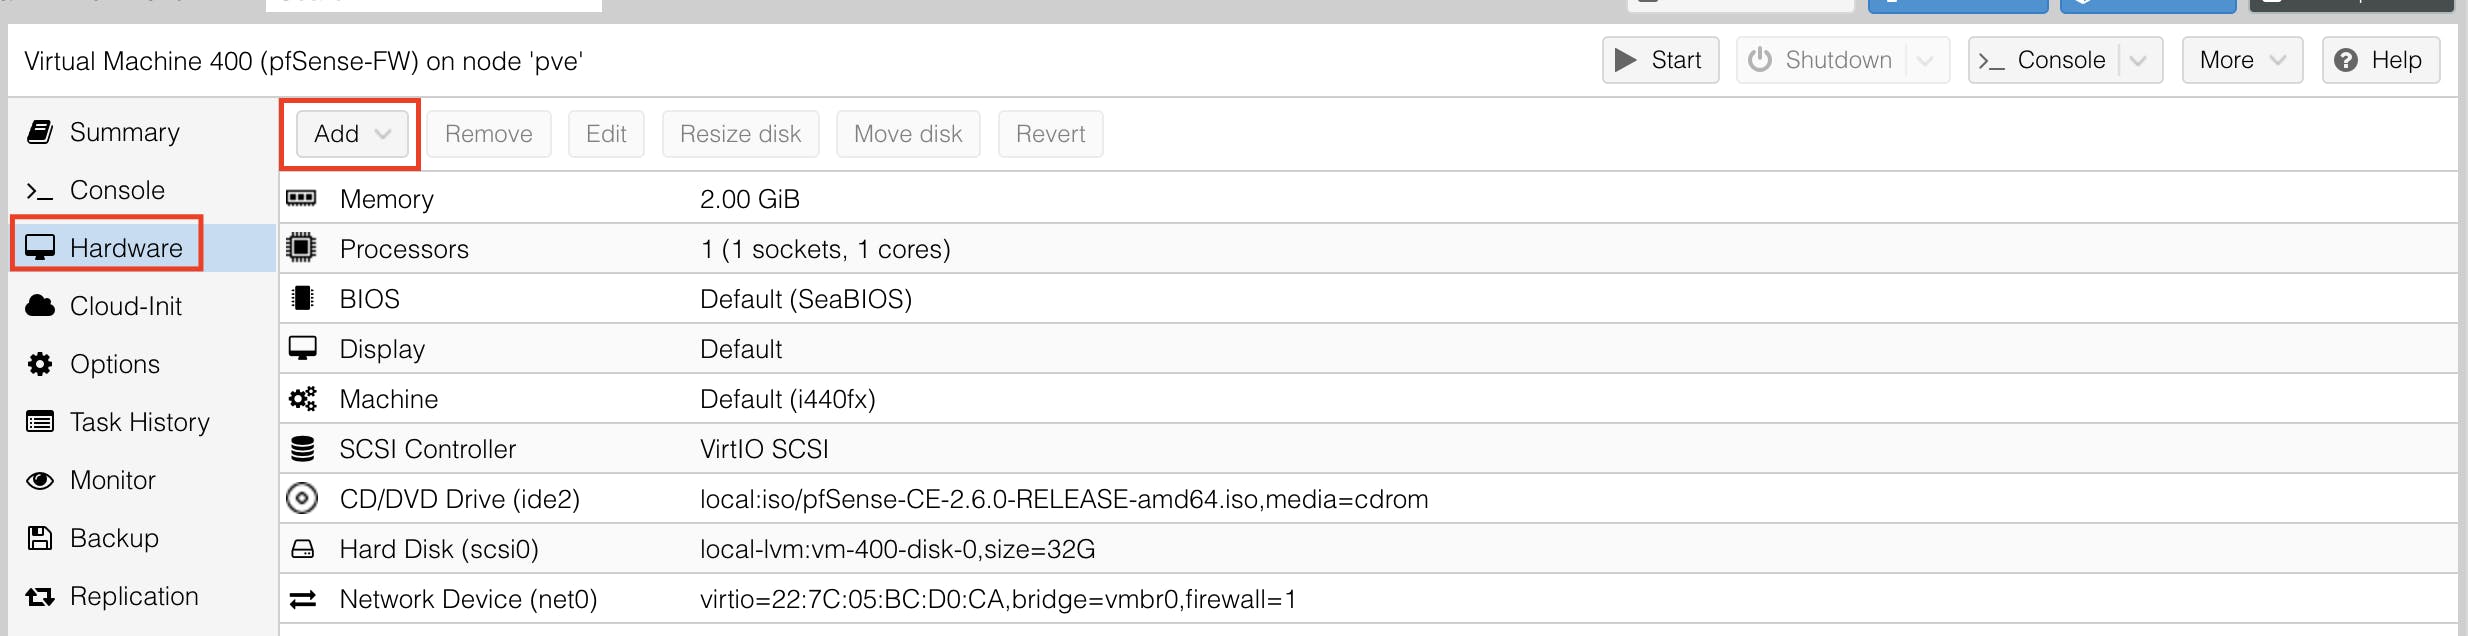 Step 3
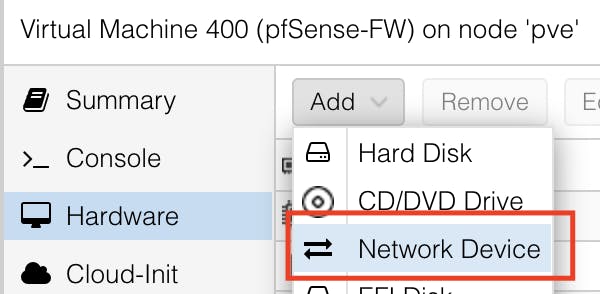
Select network device, then change the bridge from vmbr0 to vmbr1. Click add again and verify that the network device was added.
 Step 4
Start the VM and begin installing pfSense. Select install from the installer menu. Then, for partitioning, choose either guided setup with BIOS or UEFI. Do not use ZFS unless you want to use RAID.
Step 5
Once you've come to the initial setup screen, decline setting up VLANs as we won't be using them.
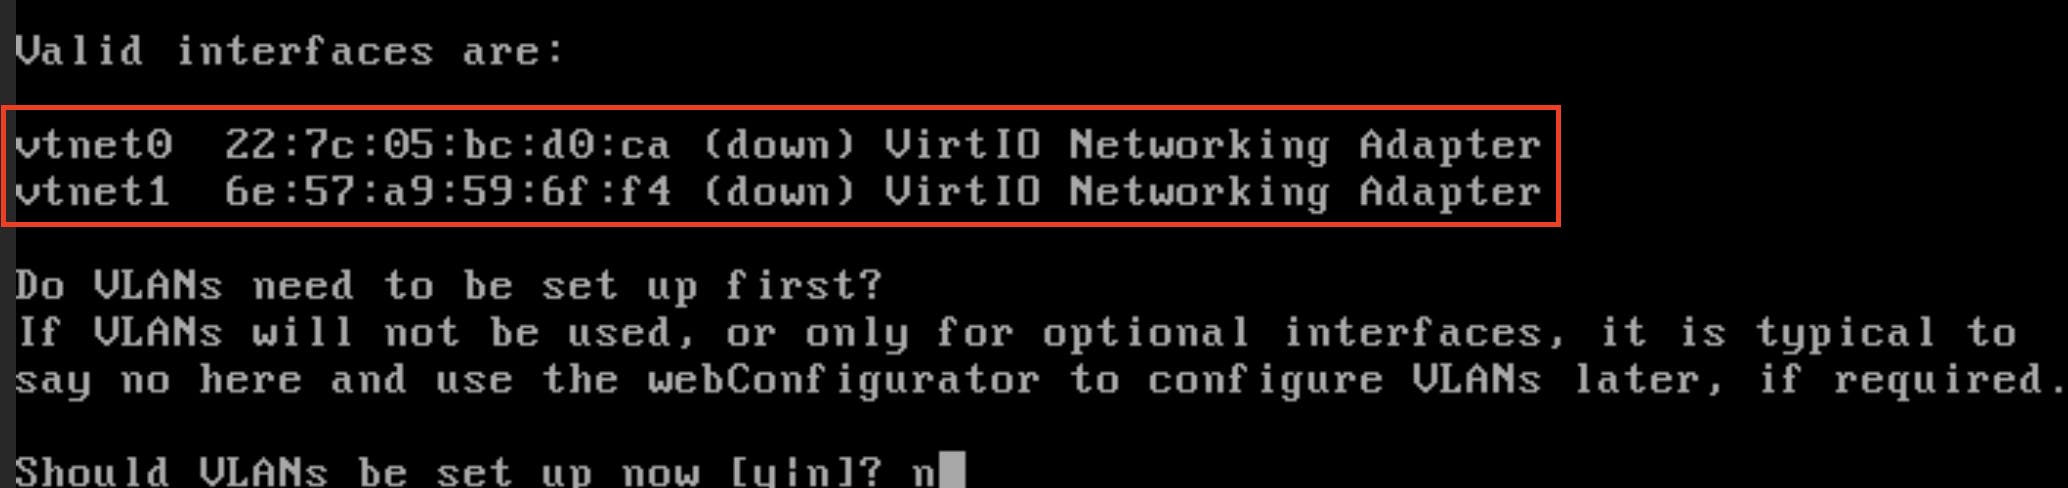 Notice that it also shows two virtual network adapters instead of one. If it doesn't show this, double check the VM hardware settings and verify that two adapters are present, with one being pointed to vmbr0 and the other to vmbr1. Also, verify that you've created a second virtual bridge in the node's network settings.
Step 6
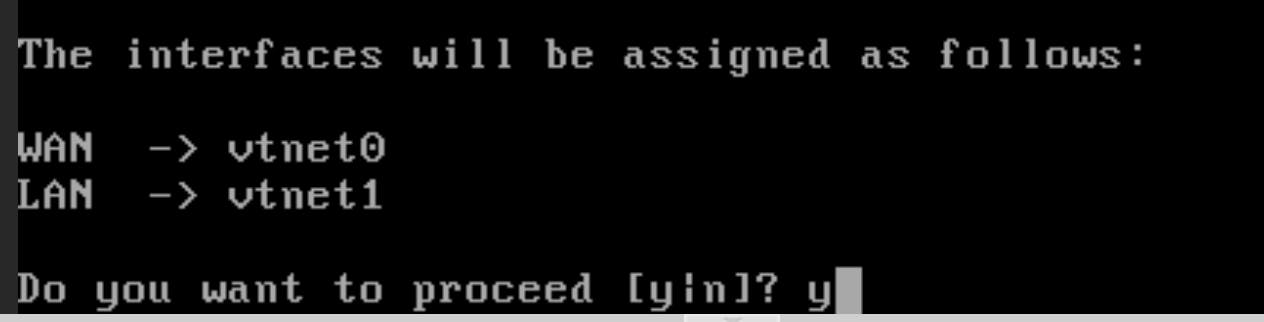
For the WAN interface name, type in vtnet0. For the LAN interface name, type vtnet1.
 When it asks you to proceed, type y.
 Once you get to the welcome screen, you will see both the WAN and LAN IP addresses. Note the LAN address for later.
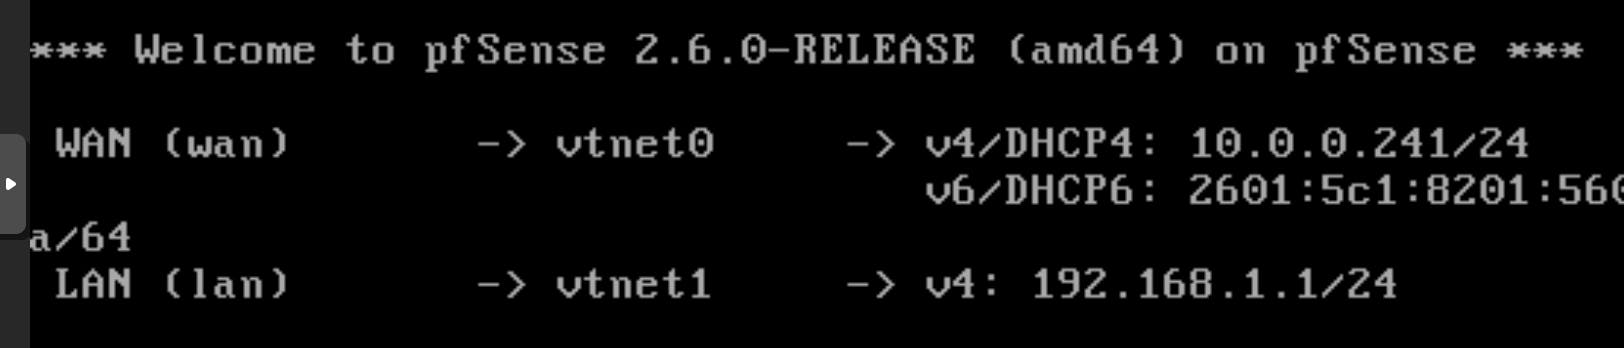 At this point, we've successfully installed pfSense. It's now time to set up the management VM as well as other VMs.
Deploying VMs behind pfSense
I will now demonstrate how to deploy VMs behind pfSense. This process will be the same for any VM you want to deploy behind any virtual router in Proxmox. So, I will only demonstrate deploying the management VM, for the sake of time; however, when you go to deploy your other VMs later, the process will be the same.
Joining the VM to the LAN bridge
When you go to set up your VM, before you finish creating it, go to the network tab and choose vmbr1 as your bridge. This is the only step you have to do, it's that simple.
 Verifying connectivity
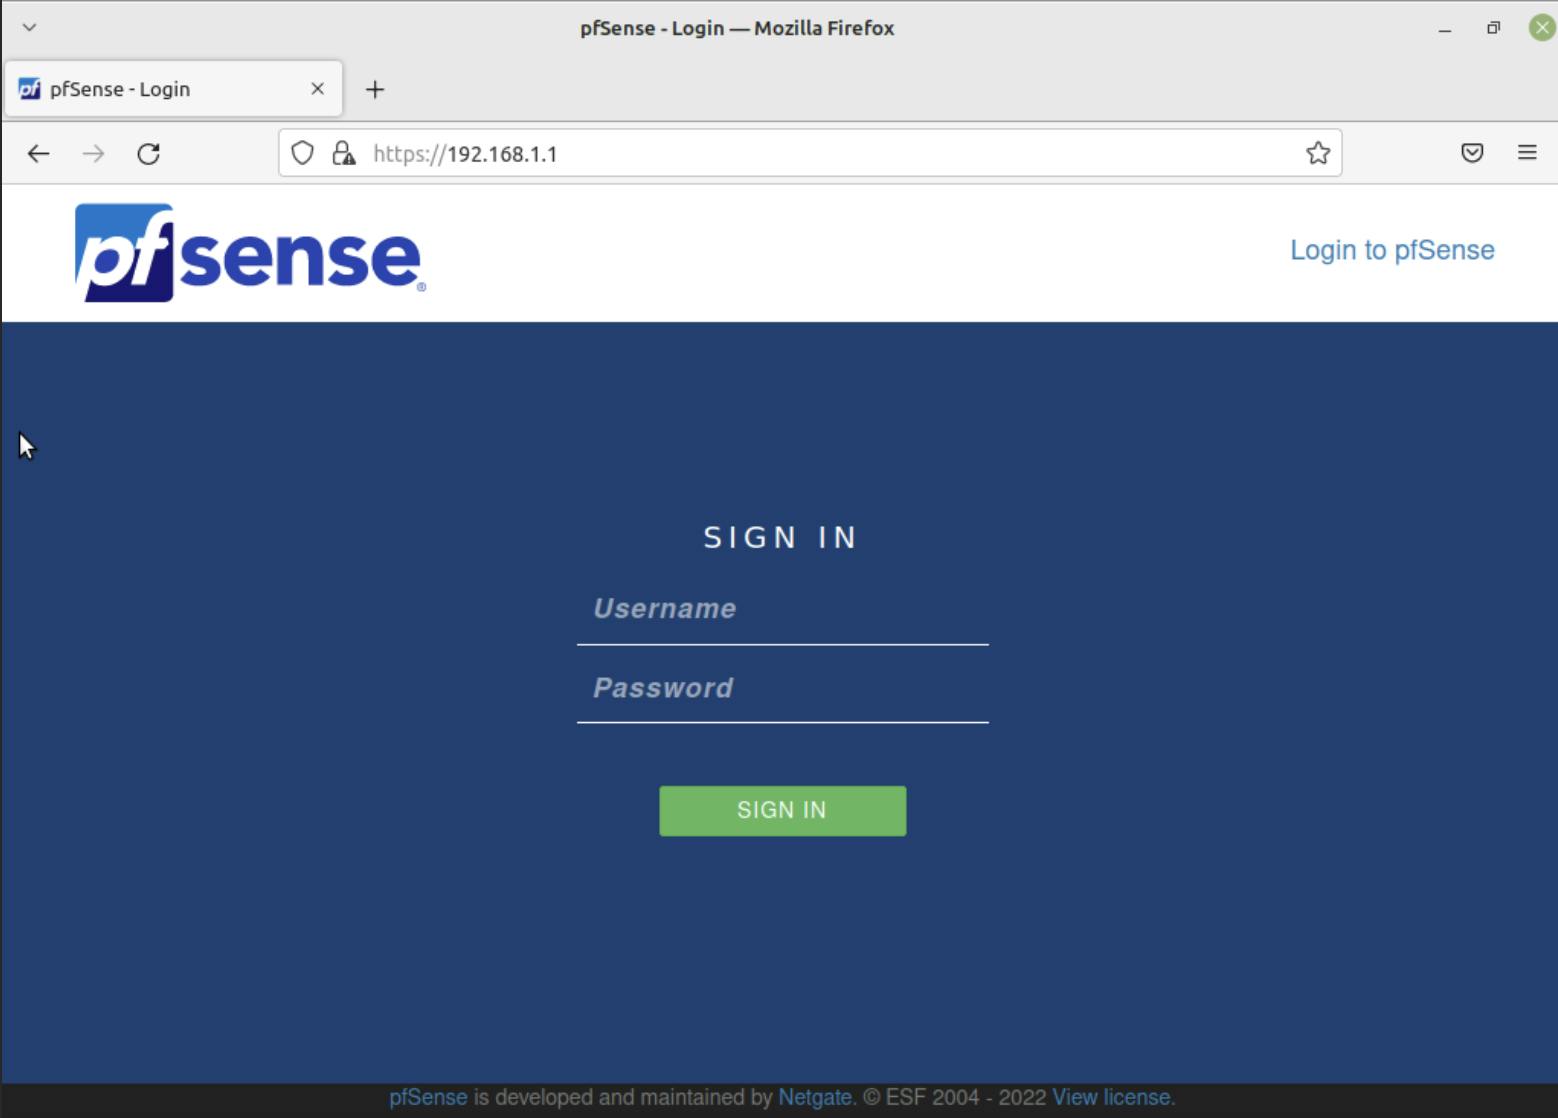
In the first image below, you can see that my VM picked up a DHCP lease from pfSense, and that I was able to ping it. The second image shows me being able to log into the web portal of the firewall, confirming connectivity.

 Congratulations, you did it!
This article demonstrated how to deploy pfSense and connect VMs behind it in Proxmox. I talked about configuring Proxmox network settings, adding a second interface for pfSense, and joining VMs to the LAN side behind pfSense.
Thanks for reading my article. Be sure to leave feedback for me as it'll help me in the future. Stick around for more articles as I plan to release tons more!